
Get ready to enhance your gaming experience with the first wave of DLC for Fire Emblem: Engage. Accessible to all players who purchase the Expansion Pass, this wave comes with a variety of perks, but none are as impactful as the addition of two Emblem Bracelets. The free Emblem Ring and the incredibly difficult Paralogue offer a chance to acquire these powerful items. With Tiki, Edelgard, Dimitri, and Claude at your disposal, your army will be unstoppable, even in the challenging Chapter 10. Don't miss out on the opportunity to upgrade your Fire Emblem: Engage gameplay - purchase the Expansion Pass now.
Finding The Rivals Emblem: Edelgard/Dimitri/Claude
Fire Emblem: Engage's Rival Emblem is an easily accessible and powerful item for players. To acquire it, simply complete Chapter Six and head over to Lookout Ridge. With the help of Vander, you'll be able to summon the Emblem and enjoy its benefits in your gameplay.
Step 1: Complete Chapter Six
The first step in acquiring the Rival Emblem is to complete Chapter Six, Yunaka and Micaiah's introductory chapter. This chapter is essential in providing context to the game's events, and once completed, you'll be one step closer to obtaining the powerful Rival Emblem.
Step 2: Visit Lookout Ridge
After completing Chapter Six, make your way over to Lookout Ridge on the south side of your map. Whether you choose to travel by foot or fast travel, you'll eventually reach Lookout Ridge and be shown a small cutscene with Vander.
Step 3: Summon the Rival Emblem
During the cutscene, your protagonist will summon the Rival Emblem and engage in a humorous conversation with Vander before receiving it for free. Once the cutscene is over, you'll be able to equip the Rival Emblem to any unit of your choosing, fight them in the Arena, and use all of its mechanics in the Ring Chamber.
acquiring the Rival Emblem in Fire Emblem: Engage is a simple and straightforward process. By completing Chapter Six and visiting Lookout Ridge, players can boost their gameplay and take their Fire Emblem: Engage experience to the next level
Recruiting The Divine Dragon Emblem, Tiki
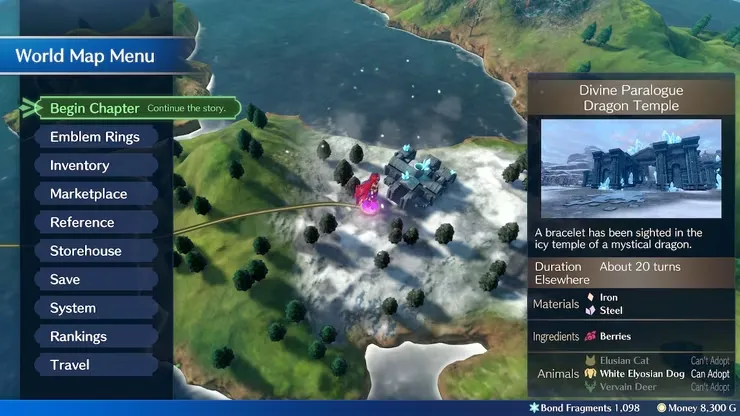
Tiki's Paralogue also features unique and challenging enemies, such as the powerful Manaketes, who require specialized tactics to defeat. Make sure to bring a variety of weapon types, including bows, swords, and tomes, to take on all the enemies in Tiki's Paralogue.
Additionally, it's recommended to bring along high-level units and to have them equipped with the best possible weapons and skills to increase your chances of success. Investing in training your units will also prove useful, as you will need to face a lot of powerful foes.
Despite its difficulty, Tiki's Paralogue offers a huge reward in the form of Tiki herself. She is a powerful unit that can make a significant impact on your team, and with her in your roster, you will be able to tackle the harder maps in the game with more ease.
Tiki's Paralogue requires a lot of preparation and effort, but the reward of recruiting Tiki is well worth it. So gather your strongest units, equip them with the best weapons and skills, and challenge the "Ancestor" to unlock the full potential of your team in Fire Emblem: Engage.
Outside The Dragon Temple - Battle
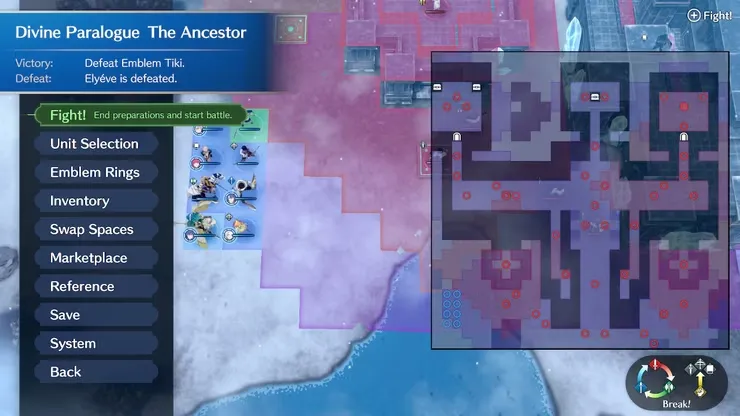
| Enemies | 3x Martial Monk (Silence), 1x Axe Fighter, 3x Thief, 3x Lance Fighter, 4x Axe Fighter, 9x Phantom Wyvern, 6x Mage, 1x Sword Fighter, 2x Sword Armor, 2x Axe Cavaliers, 1x Archer, 1x Axe Armor, 1 Martial Monk (Rewarp), 2 Lance Cavaliers, 1x Tiki *Stark changes based on level & difficulty; enemy number increased on higher difficulties, classes and levels upgrade depending on chapter |
| Deployment Allowance | 8 Units |
| Victory Conditions / Defeat Conditions | Victory: Defeat Emblem Tiki Defeat: Alear is defeated |
| Treasures | 2,000GP (North Chest), Warp staff (West Chest on the right), Rescue staff (West Chest on the left) |
| Difficulty | ★★★★★★★★★☆ (9/10) |
| Top Recommended Units | Alcryst, Etie, Yunaka, Chloe, Clanne (Lvl 6+), Celine |
To tackle the first phase of the battle effectively, focus on defending your weaker units by placing them in safe spots and keeping them out of reach of the close-by thief units. Keep in mind that the Axe Fighter can chain attack, and the Monk on top can Silence your mages, so take necessary precautions.
When advancing toward the central temple, be aware of the enemies on the far right side. They'll move toward you, but the Monk on the tower will remain stationary and won't pose any threat. As you approach the temple, eliminate the advancing enemies one by one, baiting them forward and avoiding the Wyvern waiting inside the temple. This strategic approach will help you win the battle with ease.
Entering The Temple
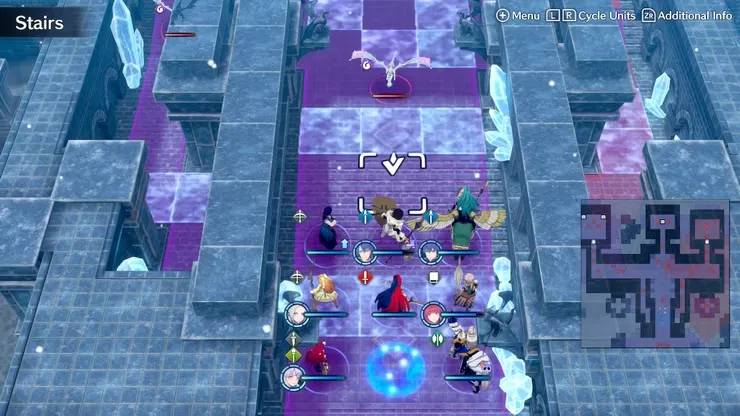
Understanding the Threats in the Temple
When entering the temple, players need to be aware of two main threats: Phantom Wyvern Fabrications and Ice tiles. Phantom Wyverns have the ability to ignore all defense and resistance and leave units in the "Freeze" status condition. Meanwhile, all units, including enemies, have increased mobility when starting their turn on Ice tiles.
Dealing with Phantom Wyverns
To effectively deal with the Phantom Wyverns, players can use archers to snipe them out of the air. Bait the wyverns forward with the unit who has either the highest avoidance or the highest HP. Then, use archers to eliminate them.
Choosing the Right Archer
Defensively, Alcryst is the better archer choice as he can survive one hit from a frozen breath. However, he requires two hits to down any of the Phantom Wyverns and typically cannot kill them in return. On the other hand, Etie is a superior archer offensively, able to first-turn one shot any enemy with a high-critical chance, but most hits will in-turn one-shot her, making her a liability for any minor mistake. Players can choose to bring both archers or invest in covering for one of their weaknesses.
Eliminating Mages in the Temple
Players can bait the mages in the east and west corridors through the walls, as well as the mages up ahead to the north side of the map without procc'ing the wyverns. Eliminating them will lower the amount of damage taken in one turn and allow players to focus on the more concerning Phantom Wyverns.
Utilizing Chloe's Resistance
Chloe shines in this situation with her high resistance. Equipping her with a Javelin and placing her within 2 spaces of Alcryst will allow her to 2x the mages without taking much damage.
Dealing with Reinforcements
After engaging with the farthest wyvern in the central chamber, reinforcements will begin spawning from the center-south side of the map. This always consists of one Phantom Wyvern and two random enemies. These reinforcements will continue to spawn every other turn as long as their preceding wave has been defeated.
Forming a Strategy
Players have two options in dealing with reinforcements: continue onward in a turtle formation, covering two angles, or split forces into two groups, with one exploring the temple while the other camps the respawn spot to ensure they're not flanked during their siege.
Conquering the Temple
By understanding the threats, choosing the right archers, eliminating mages, utilizing Chloe's resistance, and forming a strategy, players can successfully conquer the temple and overcome the challenges presented by the Phantom Wyvern Fabrications and Ice tiles.
Opening Tiki's Room
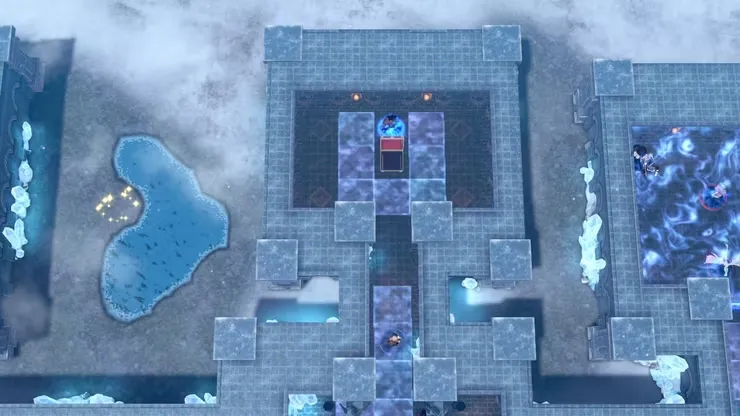
To activate the first sigil, defeat the Rewarp-Monk and axe-armored unit guarding it in the north-most room. Once the enemies are defeated, you can open the two treasure chests and activate the sigil to open the door to the West Hall. However, it is recommended to wait with activating the sigil until you've dealt with some of the enemies in the West Hall to avoid being overwhelmed.
In the West Hall, you'll need to bait and attack the enemies as you did before. Use a tank/avoid unit to draw the units down the hallway, then attack them in the central heart chamber. Once the enemies are defeated, you can raid the chamber for treasure.
Activating each sigil will place more ice tiles on the map, so be aware of the increased mobility of enemy units. Additionally, activating the second sigil will allow all the enemies in Tiki's room to pour out, so it's recommended to raid the chests first and send your most mobile units into the room.
Three additional Phantom Wyverns will also spawn on the south side of the map after activating the second sigil. To avoid them causing trouble, either keep your archers on their spawn point to deal with them, or ignore them and head straight for Tiki. Remember, Tiki is the only enemy that needs to be defeated to win the battle.
Fighting Tiki
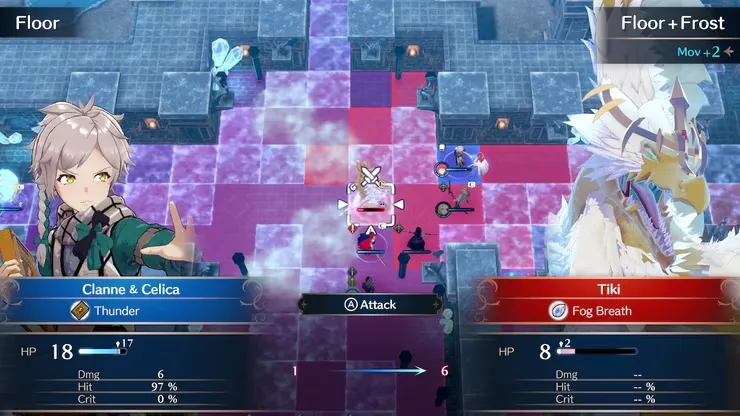
To maximize your chances of success against Tiki, it is crucial to understand her abilities and attack patterns. Tiki's high HP pool, ability to resurrect allies, and unique Fog Breath move can make her a formidable opponent.
To tackle Tiki, archers should be at the forefront of the battle, using Alear's unique ability to deal extra damage where necessary. While mages may be ineffective against Tiki's high resistance, they can play a crucial role in crowd controlling the cavalry units that accompany her.
It is also essential to be cautious of Tiki's Fog Breath attack, which creates an area of fog and gives both enemy and ally units an avoidance bonus within the affected tiles. To minimize its impact, it is best to defeat Tiki in one turn if possible, or to focus on defeating the enemy units to prevent multiple attacks in the next phase.
When facing Tiki, prioritize taking out her quickly and efficiently, as defeating her will reward you with her Emblem Bracelet, which can then be equipped to your units in future battles. Additionally, ignoring enemy units is a viable option if you are confident in your team's ability to defeat Tiki in one turn.
In conclusion, to defeat Tiki, it is crucial to understand her abilities and attack patterns, use archers and mages effectively, be cautious of her Fog Breath, prioritize defeating her in one turn, and equip her emblem bracelet to your units in future battles.
Hope you will be satisfied with this article. Don’t forget to bookmark our page if you want to read more Tech, game updates, and entertainment news
Disclaimer: The above information is for general informational purposes only. All information on the Site is provided in good faith, however, we make no representation or warranty of any kind, express or implied, regarding the accuracy, adequacy, validity, reliability, availability or completeness of any information on the Site.
